
Organize research with notebooks
A commonplot notebook keeps one topic's resources, documents, AI chats, and audio overviews together. Learn to create one, add resources, and make it public or private.
Notebooks are how you organize content in commonplot. A notebook matches one topic or research question and holds the resources it needs, the documents you write, AI chats, and audio overviews. When you ask AI inside a notebook, it can read all of this directly.
When to create a notebook
- For a research or writing project, such as "AI agent market report, Q3 2026", use a private notebook.
- For a long-running reading list on a topic, such as "Good LLM evaluation papers", make it public and share it on your profile.
Names phrased as a question or an outcome are easier to find later: "Taiwan semiconductor export trends" is clearer than "Semiconductors".
Create and edit
Choose Create → New notebook, or create one from the Notebooks tab on your profile. Fill in:
- Name
- Description (optional)
- Make private: when on, the notebook stays off your public profile. New notebooks are private by default.
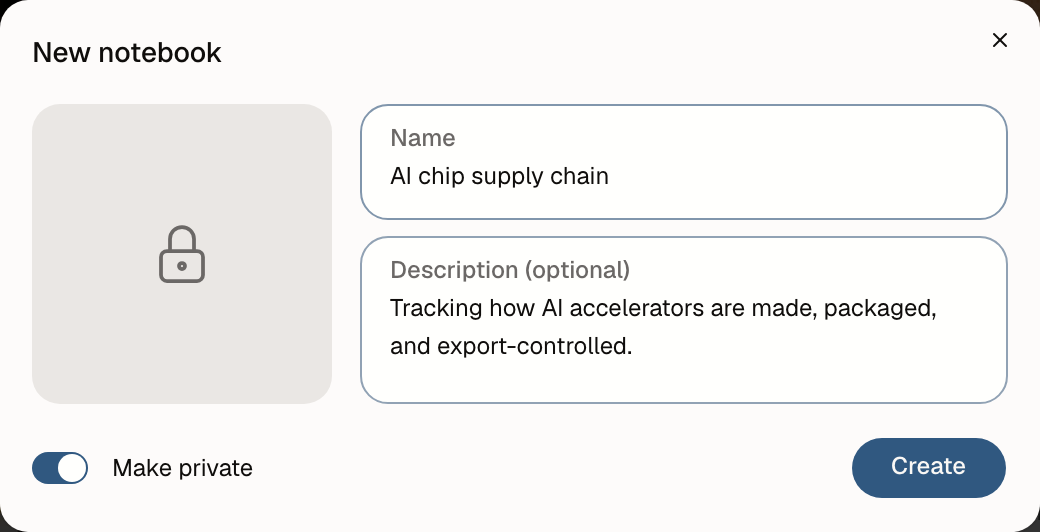
Later, open Notebook options in the resources rail and choose Edit to change the name, description, or visibility, or Copy public link to share a public notebook.
The Free plan allows up to 30 notebooks; Pro has no limit.
The notebook layout
A notebook has three areas:
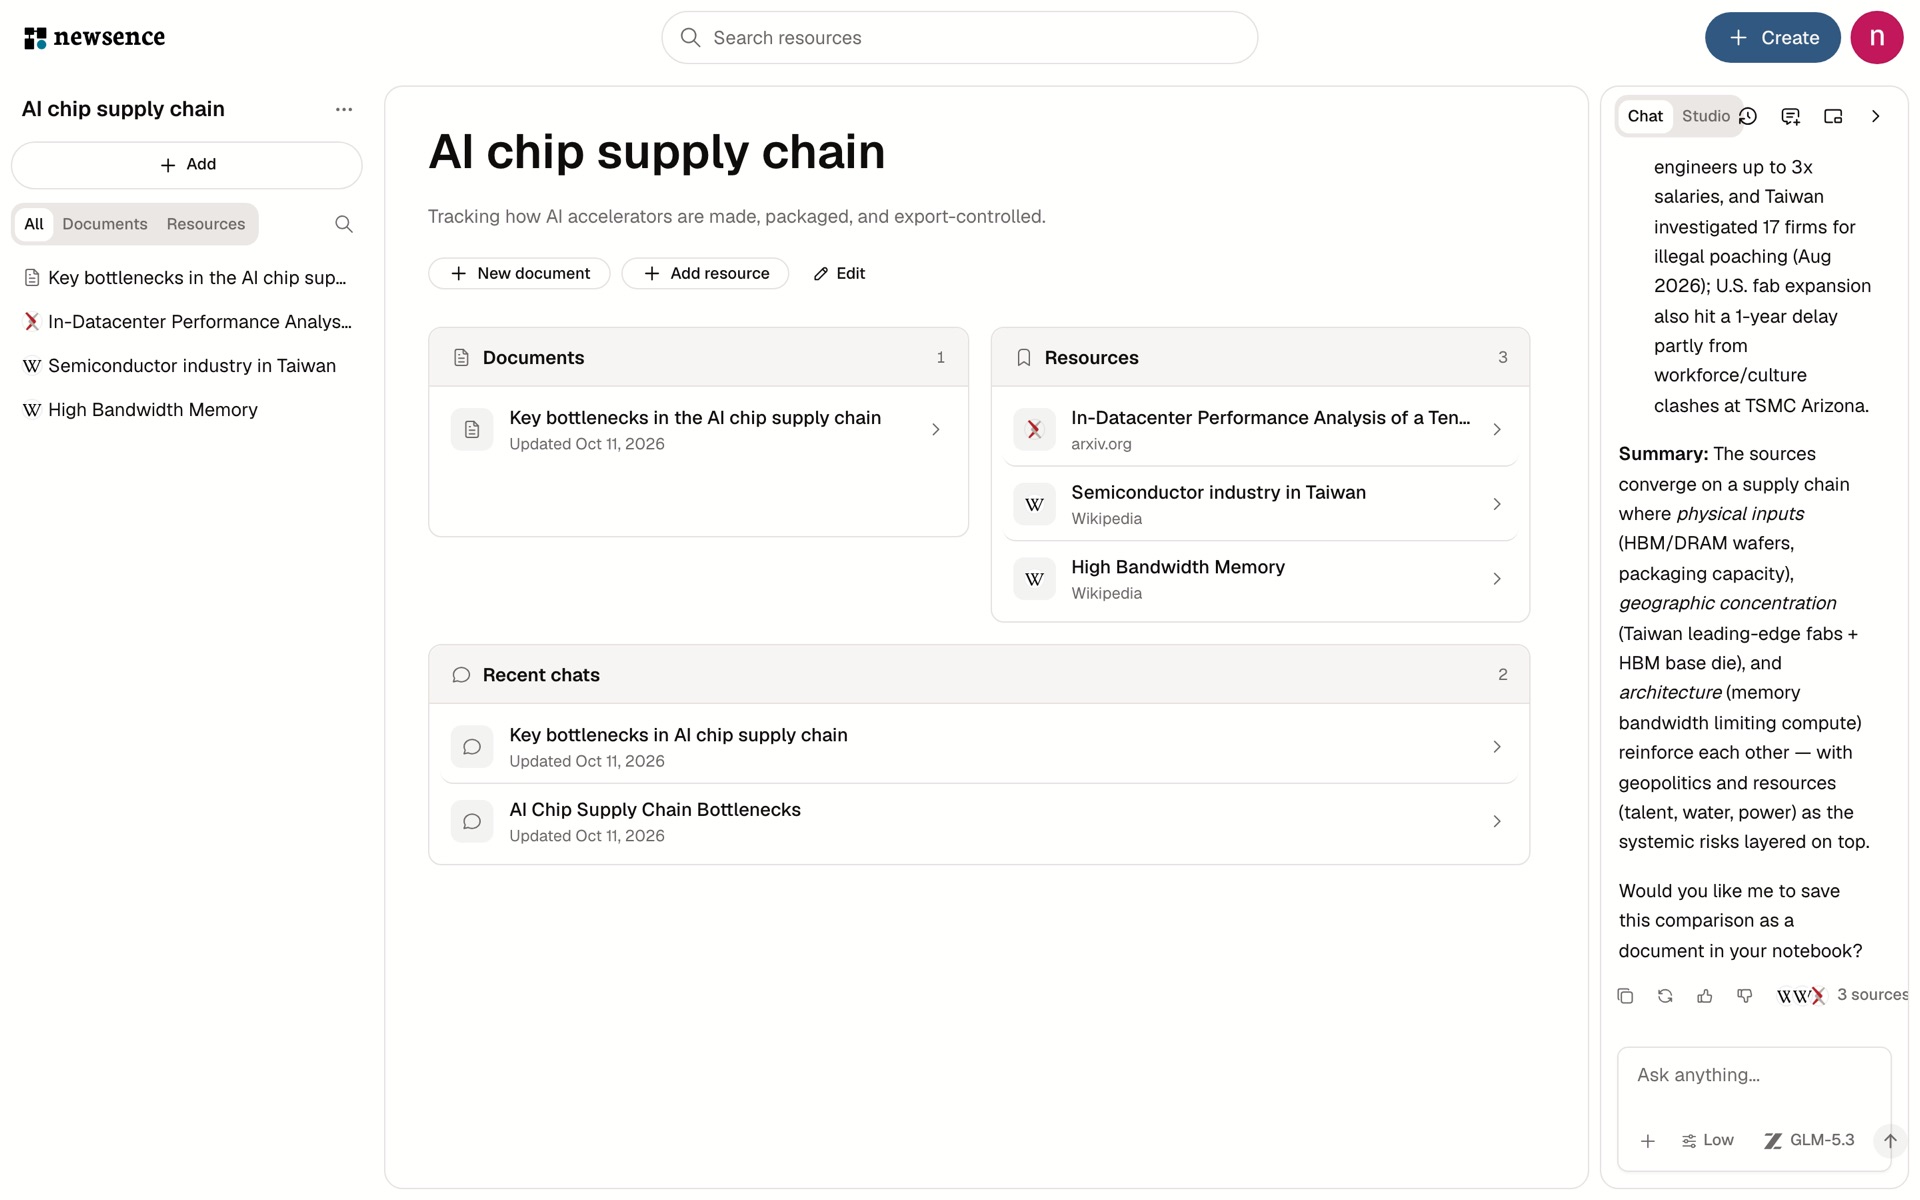
- Resources rail (left): the notebook's resources, documents, and outputs. Filter by All / Documents / Resources, or use Search this notebook.
- Main area (center): the notebook overview (documents, resources, and recent chats), or the resource you're reading or the document you're editing.
- AI rail (right): Chat and Studio tabs. Dock the AI rail, switch it to a floating window, or collapse it.
Add resources
In the resources rail, choose Add → Add resource to paste links or upload PDFs and images, the same way as in Save articles, papers, and videos. When saving from Discover, you can also pick this notebook under Choose save destination.
AI can read the full content once Imports shows Ready to read.
Remove a resource
Choose Remove resource to take an item out of this notebook. It stays in your saved resources.
Documents and outputs
Choose Add → New document in the resources rail, or ask AI to write one; either way the document lives in this notebook. Audio overviews and generated files also appear under the Documents filter.
Delete a notebook
Choose Delete under Notebook options to permanently delete the notebook and the documents in it. Its resources stay in your saved resources.
What a public notebook shows
Visitors to your public notebook see its name, description, resource list, and the documents you have shared. Private documents, AI chats, and uploaded files stay private.
Last updated on
Save articles, papers, and videos
Save web pages, YouTube videos, X posts, and papers to commonplot, upload PDFs and images, and follow import progress, summaries, and translation.
Library and storage
Manage uploaded PDFs and images, generated audio, and chat attachments in the commonplot Library, and check storage usage and upload limits.